
.png)

Step By Step: How to Lay a Stunning Natural Stone Patio in the UK
- Sale Fencing & Surfacing Ltd
- May 7, 2025
- 7 min read

Updated: May 9, 2025
Step By Step: How to Lay a Stunning Natural Stone Patio in the UK

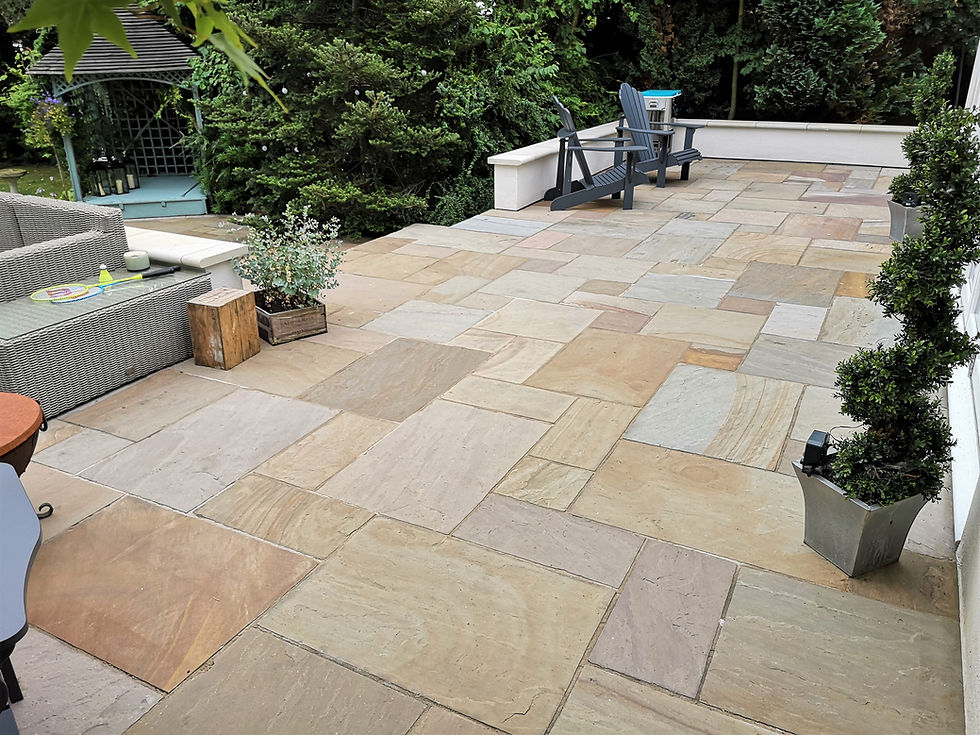
Transform your outdoor space into a stunning retreat with a natural stone patio! Laying a patio is not just about aesthetics; it's an investment in your home's appeal and your outdoor living experience. The UK is renowned for its breathtaking landscapes, and a beautifully laid natural stone patio can seamlessly integrate into any garden, giving you that perfect outdoor haven. With the right materials, tools, and a little bit of elbow grease, you can create a patio that will impress friends and family for years to come. Let's roll up our sleeves and dive into this rewarding DIY project!
Choosing the Right Natural Stone
The first step in laying a stunning patio is selecting the right natural stone. In the UK, you have an array of options, from sandstone to granite and limestone. Each type has its unique character and benefits. For example, sandstone is popular for its warm hues and excellent slip resistance, making it a practical choice for patios. Granite, on the other hand, offers incredible durability and a sophisticated look. Consider the climate, your garden’s style, and your budget when making a choice. Here are a few tips to help you decide: - Look for stones that are appropriate for your local climate, as some materials can crack in severe cold. - Consider the finish; honed stones are smoother while riven stones are textured and provide better grip. - Don’t shy away from mixing different stones for a unique look, just ensure they complement each other. Getting samples can be a game-changer; it allows you to see how the stone looks in your own backyard's lighting and setting!
Planning Your Patio Layout

Before you start laying stones, it's vital to plan your layout. A well-thought-out design not only enhances aesthetics but also ensures functionality. Start by measuring your patio space and marking out the areas with stakes and string. Consider any existing features like trees or flower beds, and how they can be integrated into your design. Popular patterns include herringbone, random layouts, or circular designs, each offering its own flair. Here are a few planning tips: - Sketch your design on paper or use patio design software to visualize your layout. - Leave ample walking space around furniture and plan for drainage so that water flows away from your home. - If you're feeling adventurous, try a curved edge instead of straight lines for a natural look! Visualizing how you want your final patio to look can help guide you during installation.
Gather Your Tools and Materials
With your plans in hand, it’s time to gather all the necessary tools and materials for the job. A well-equipped DIYer is a successful DIYer! Essential tools you'll need include a shovel, a level, a rubber mallet, and a trowel. If you're using mortar, a mixing paddle and bucket will be handy. Additionally, a compactor plate can help you ensure a solid base for your stones. Materials to gather: - Natural stones of choice - Sub-base material (like crushed stone or gravel) - Sand for leveling (if needed) - Mortar or jointing compound (if applicable) - Landscape fabric to prevent weed growth Always double-check your materials before starting. A little preparation goes a long way in preventing project delays!
Preparing the Site
It's time for the physical work to begin! Site preparation is crucial for the longevity and stability of your patio. Start by removing any grass or debris from the area you marked out. You’ll want to dig down to a depth of around 10-15 cm, depending on your chosen base material. This process ensures that the stones will sit flush with the ground and won’t move over time. Here are some important steps to follow: - Make sure to compact the soil you've dug out to create a firm foundation. - Lay down landscape fabric to prevent weeds from growing up through your patio. - Spread the sub-base material evenly and use a compactor to achieve a solid base. Patience in this stage pays off; a well-prepared site leads to a more durable and aesthetically pleasing patio.
Laying the Base Layer

With your site prepared, it’s now time to lay down the base layer! This layer is essential for drainage and stability, and typically consists of crushed stone or gravel. Aim for a depth of 5-10 cm, which you’ll then compact to create a sturdy foundation. After spreading your base layer, ensure that the surface is level. A properly laid base will prevent shifting and sinking of the stones over time. for this step: - Use a level to check that the base is even across the whole area. - Slope the base slightly away from your house to promote water drainage. - Compact the base thoroughly; if it’s not solid, your patio isn’t going to be either. Getting this layer just right will set you up for success as you begin to lay your stones!
Laying the Natural Stone

Now comes the fun part—laying your natural stone! Start at a corner or edge of your planned layout, placing each stone onto the base. If you're using mortar, apply it to the base and the underside of the stone. Use a rubber mallet to gently tap the stones into position, ensuring they are level with each other. Be mindful of gaps; you want a consistent spacing that will be filled later. Here’s how to ensure a successful installation: - Use a level frequently to check that each stone is sitting flush. - Work from the outside in, ensuring your patterns remain true. - Don't rush! Take your time to adjust stones as needed for a perfect fit. This part is where your vision starts to come to life!
Filling the Joints
Once your stones are laid, it’s time to fill in the joints for that polished look! Using a jointing compound or sand, fill the spaces between the stones. This not only enhances the appearance but also helps to keep the stones in place. If using sand, sweep it across the stones and into the joints, then spray with water to help set it. Consider these tips: - Use fine sand to ensure a smooth finish, especially if your stones are closely spaced. - Make sure to compact the jointing material to prevent future settling. - Don’t forget to clean off excess material from the stone surfaces before it dries! Proper joint filling is key; it ensures longevity and beauty in your patio.
Sealing the Patio
With the joints filled, it's time to protect your hard work by sealing the patio! Sealants help prevent stains, enhance colors, and provide a barrier against moisture. Depending on your chosen stone, you might need a specific type of sealant, so double-check the product instructions. Apply the sealant with a brush or sprayer, ensuring even coverage. Keep these points in mind: - Let the patio dry for a few days before sealing to ensure the joint material is set. - Reapply sealant every couple of years to maintain protection and appearance. - Always test on a small area first to ensure compatibility. Sealing your patio not only protects your investment but also adds to its beauty over time!
Landscaping Around Your Patio

Now that your patio is complete, it's time to turn your attention to the landscaping! Incorporating plants, flowers, and decor can elevate the entire space, making it even more inviting. Consider adding flower beds, decorative stones, or even a fire pit for ambiance. Choose plants that complement your patio's color scheme while being suitable for the UK climate. Some landscaping ideas include: - Adding tall grasses or low shrubs along the edges for natural privacy. - Incorporating pots of colorful flowers or herbs next to seating areas. - Using outdoor furniture that matches the natural aesthetic: think wooden benches or woven chairs. Good landscaping can make your patio not just a place to sit, but a beautiful haven for relaxation and entertainment.
Maintaining Your Natural Stone Patio

To ensure your stunning patio remains beautiful for years to come, regular maintenance is key! Start with simple tasks like sweeping off debris and hosing down the surface to prevent stains. Depending on your stone type, consider using a gentle cleaner to keep it looking fresh. Check for any shifting stones or cracks and address issues before they become major problems. Here are some maintenance tips: - Clean spills immediately to prevent staining, especially with oils or acidic substances. - Reseal your patio every few years to keep it protected. - Keep an eye on weeds and remove them promptly. A little regular care can go a long way in prolonging the life of your patio!
Creating a Cozy Atmosphere

To truly enjoy your patio, think about how to create a cozy atmosphere! Adding elements such as outdoor rugs, cushions, and string lights can transform your patio into an inviting retreat. Soft lighting is especially magical at night—string lights or lanterns can enhance the ambiance beautifully. Consider incorporating a fire pit for warmth and a gathering place for friends and family. Some ideas include: - Adding plush outdoor seating with colorful throw pillows. - Using rugs to define areas, like a dining spot or a lounge area. - Incorporating plants and candles for added warmth and a touch of nature. A cozy patio invites relaxation and socialization, making it a wonderful extension of your home.
Adding Functional Features

Enhance your patio's usability by adding functional features! Consider elements like an outdoor kitchen, a barbecue station, or even a water feature for relaxation. These additions can elevate your outdoor living experience and make entertaining a breeze. If you often host gatherings, a designated dining area with an umbrella or pergola can provide needed shade and comfort. Here’s how to add functional features: - Plan the layout to ensure easy movement and access to amenities. - Choose materials for additional features that harmonize with your patio’s stone. - Think about incorporating lighting to highlight functional areas for evening use. These additions can turn your patio into the ultimate outdoor oasis, perfect for hosting or simply enjoying a quiet evening.
Enjoying Your New Patio
Now that you’ve created your stunning natural stone patio, it’s time to enjoy it! Whether it's a quiet morning coffee or a lively barbecue party, your patio is ready to cater to all types of occasions. Take a moment to appreciate your hard work and the beauty you've created. Invite friends and family over to celebrate your achievement and make lasting memories together! Remember to embrace each season; your patio offers a unique experience in the spring flowers, summer sunshine, autumn leaves, and even winter frost. Enjoying your patio is about cherishing each moment—relax, entertain, and soak in the views of your garden!
Conclusion
Laying a natural stone patio is a rewarding project that enhances your home's beauty and functionality. By following these steps, you can create a stunning outdoor space that reflects your style and offers a retreat for years to come. Don’t hesitate to share your patio journey with others, and let your creativity shine through! Happy patio laying!


Comments